Watercolor Lampshade
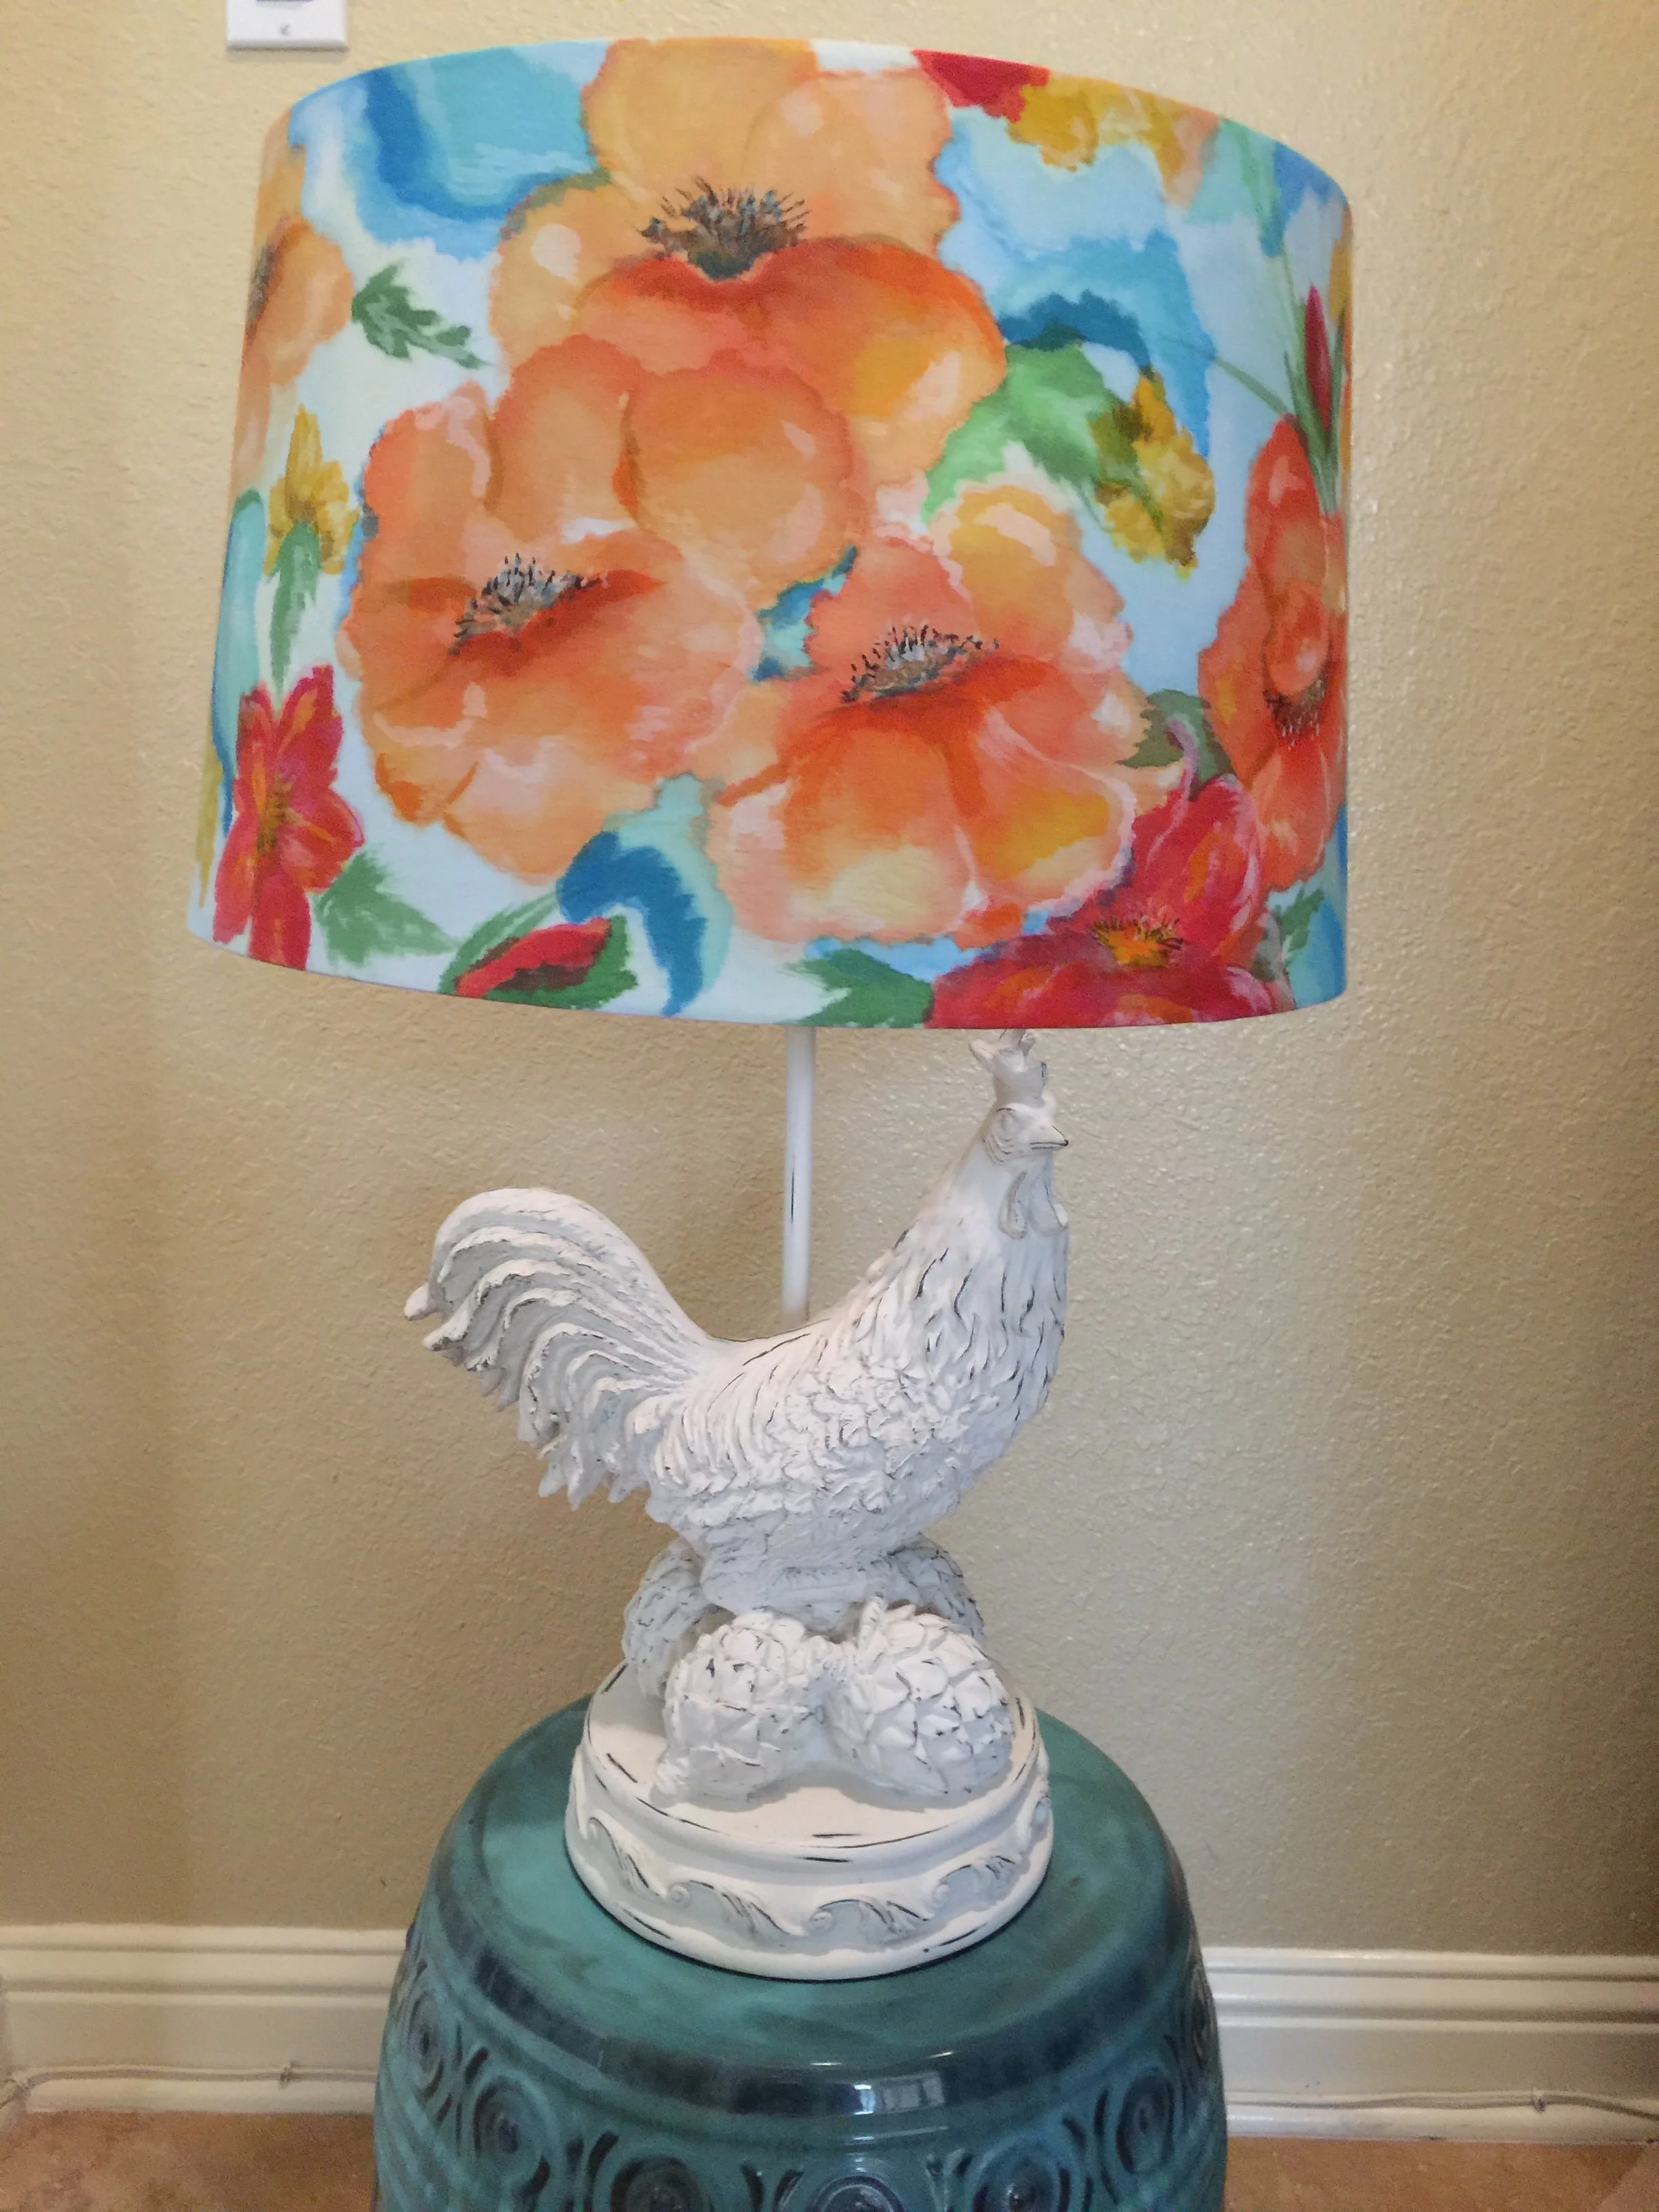
For a more advanced technique that’s a little challenging, I’m sharing with you my watercolor-painterly styled lampshade. This technique feels very forgiving and free form. Allowing you to create a painted abstract design without a pattern. The challenge however, is knowing when to stop painting and not overdo or rush the layers. You will need to have self control, allowing each layer to dry and knowing when to stop to prevent “muddying” your colors together.
To achieve this watercolor effect, I recommend using a hard-lined lampshade and acrylic inks. Acrylic inks are liquified pigment that are ready for direct application, creating a more opaque and brilliant look right from the bottles. It can also be diluted with water for a more translucent application allowing you to create depth and layers.
Other Supplies You'll Need
Misting bottle with water to wet your shade and soften sharp painted edges. Start with a wet shade not dripping...just wet to touch.
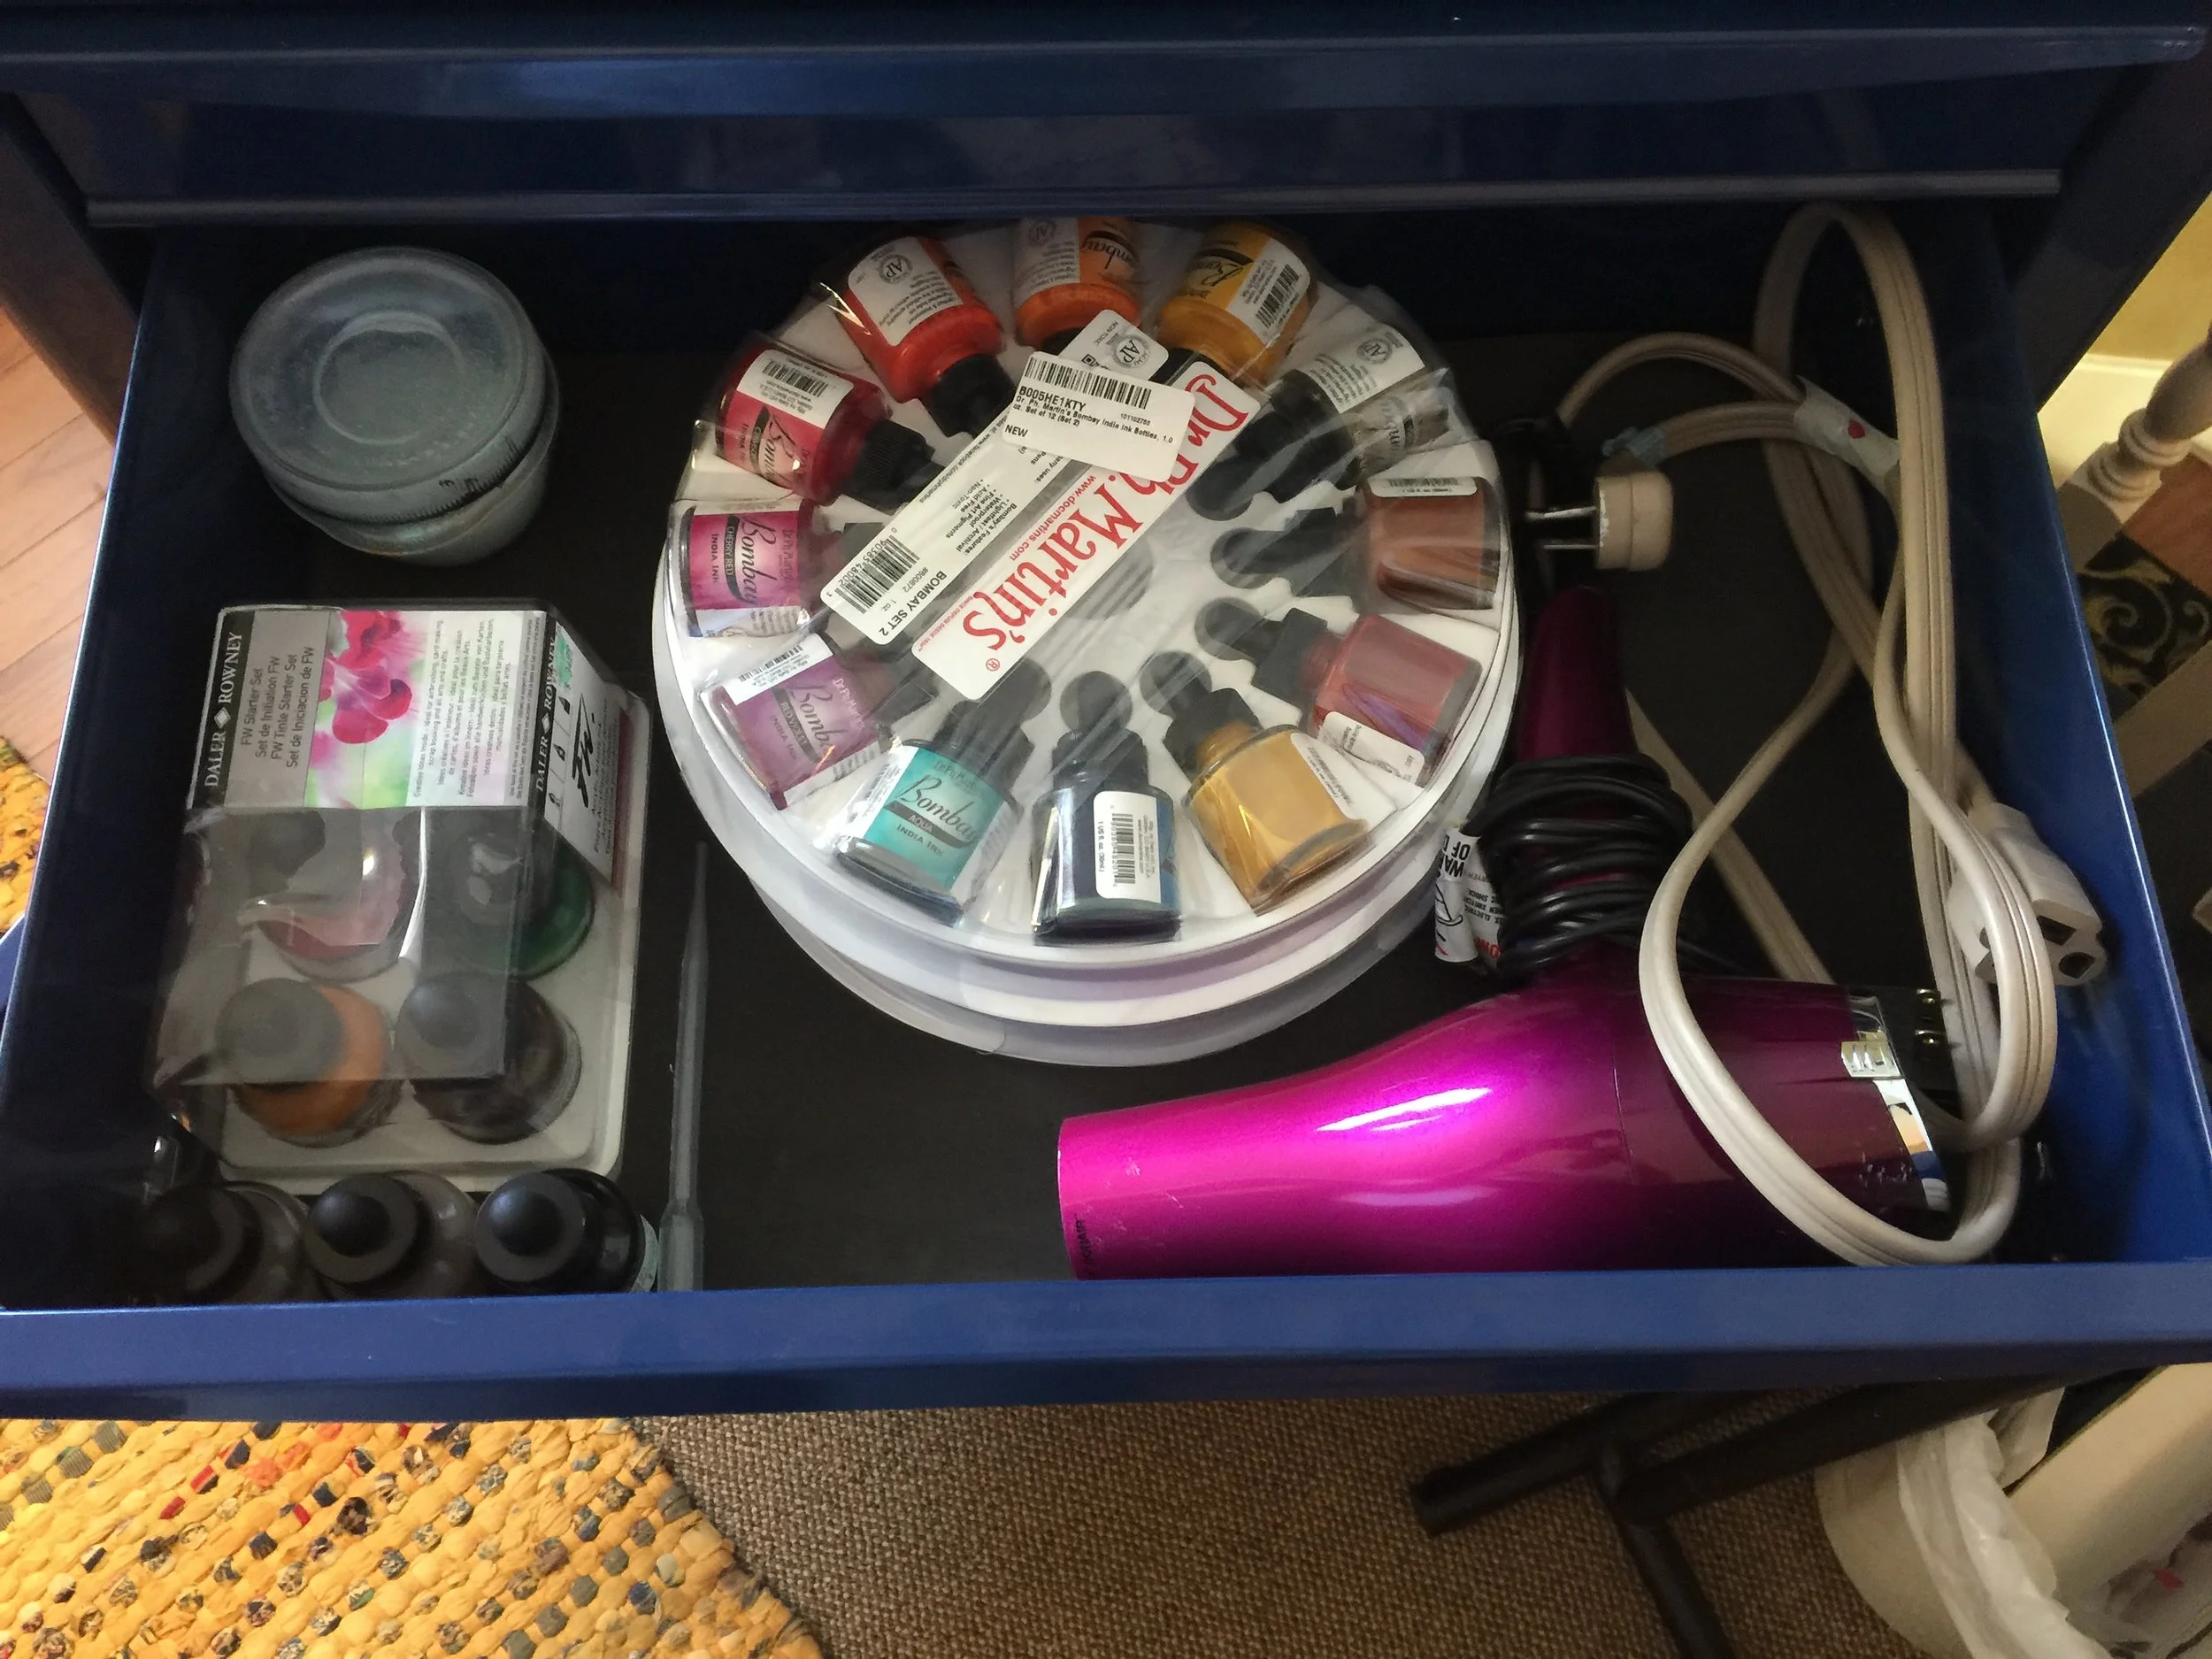
Medium to large watercolor brush to help with details (optional technique:create your initial design outline as if a pencil). Simply use the wet brush in diluted ink: a color you are using in the design, freely sketch a rough design with the tip of your brush. This works best if you feel unsure and need some idea of where it will space out or as a rough guide. Be sure to blend away your outline on your finished painting.
Mopping brush used for dabbing color to form larger shapes such as the petals and leaves. This is achieved by wetting the mop but not drippy, then dipping into you color of choice and intensity. Begin mopping the color onto the damp shade in the form of an abstract flower or design. Work in small sections allowing the ink to spread and bleed outward to achieve the watercolor painterly look. If you feel you want it more diluted and translucent, mist the shade in that area then blot with soft white cloth removing excess ink. If you want it more intense, dry the area then mop in with another layer. Use a cool blow dryer to expedite drying, a hot dryer will melt and warp the shade liner.

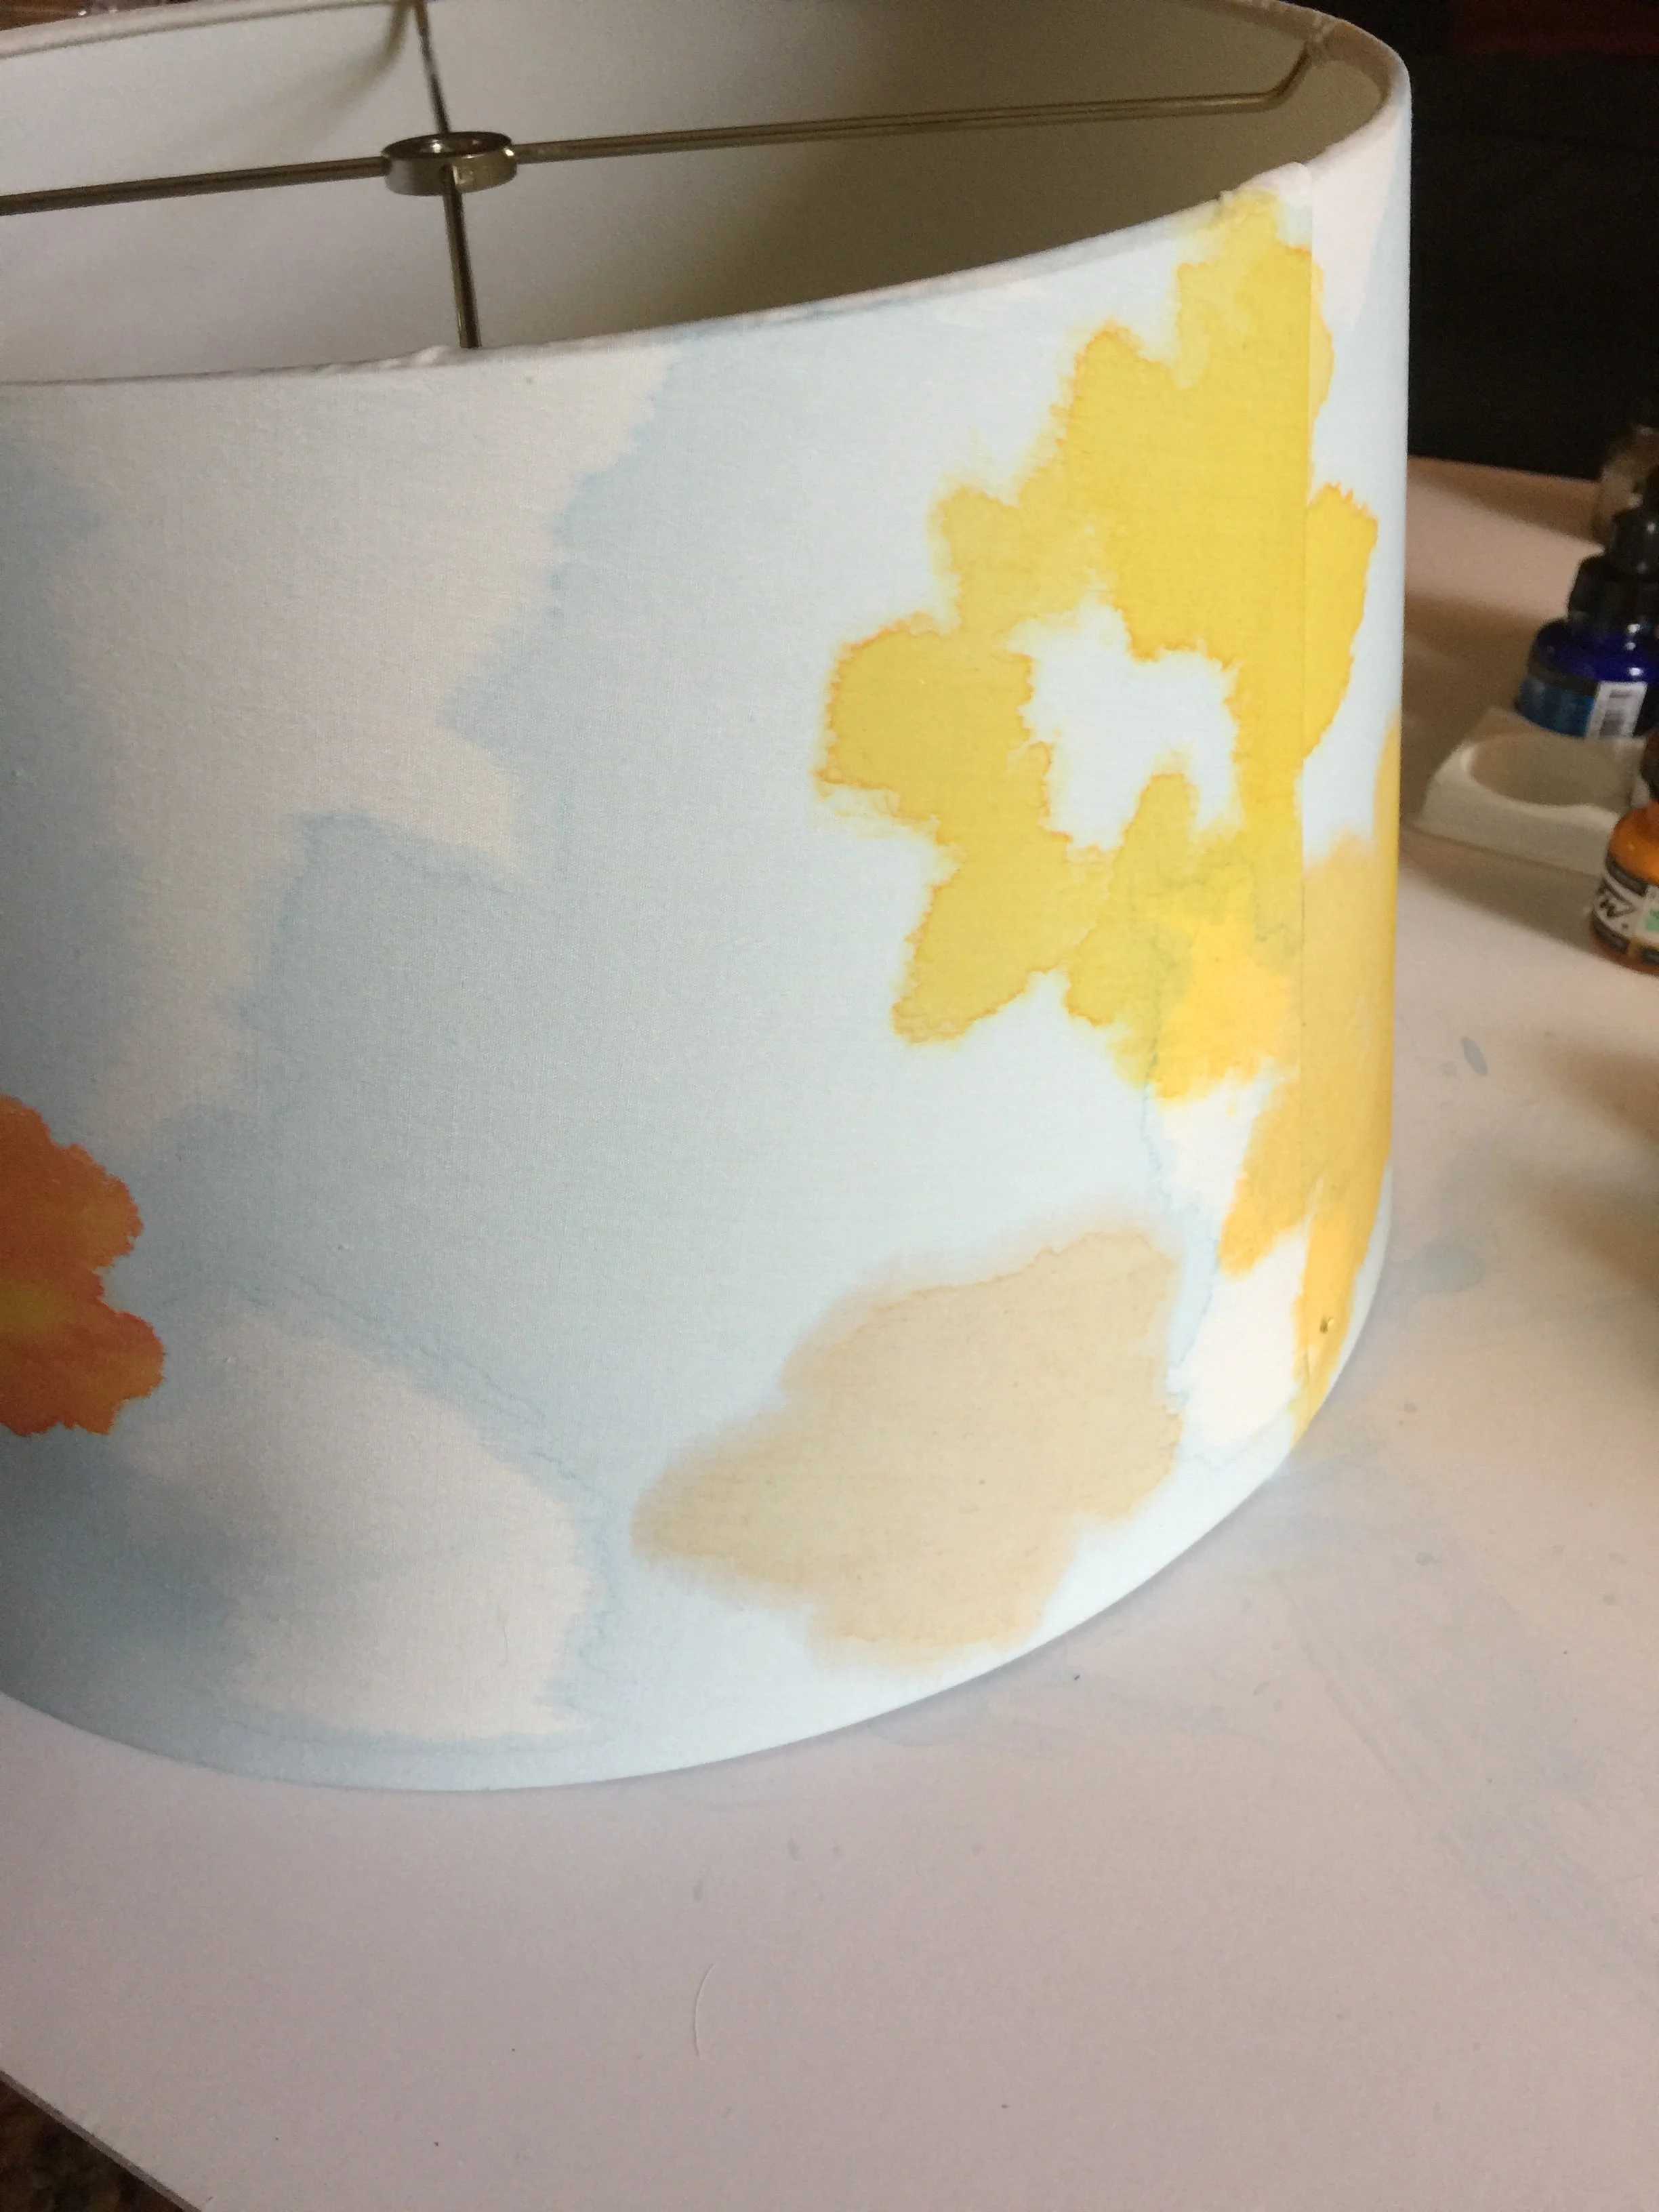
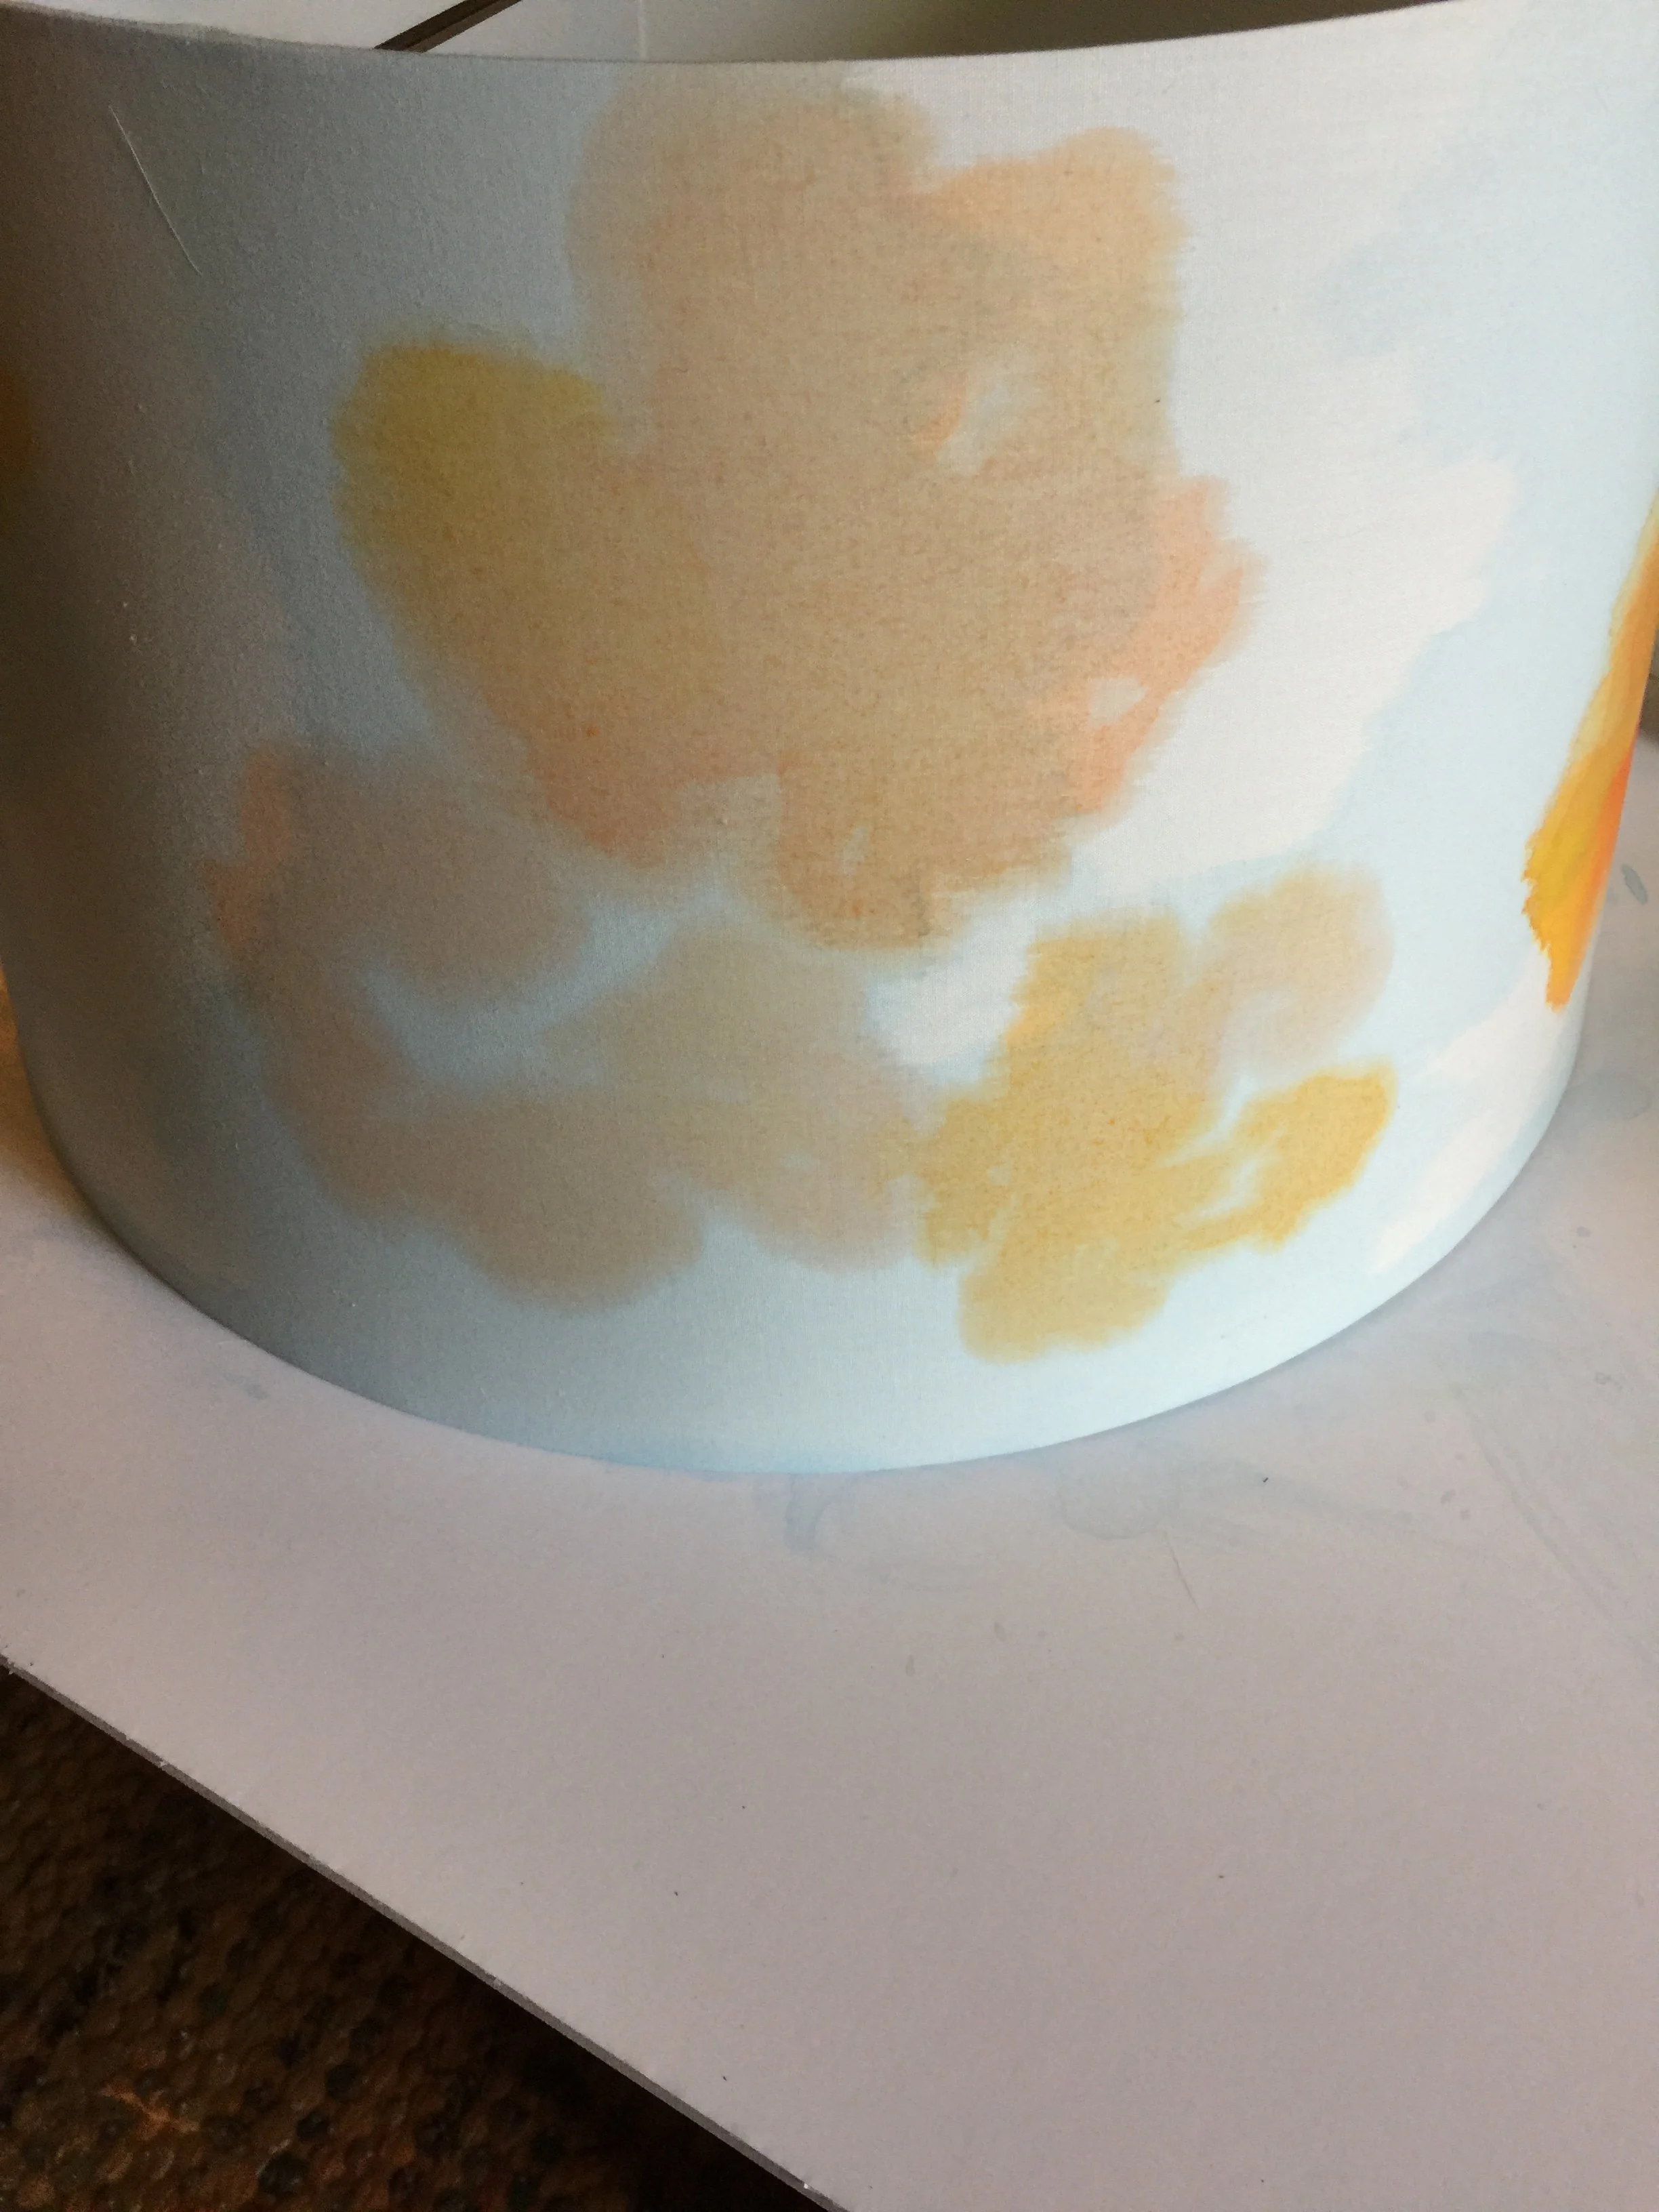
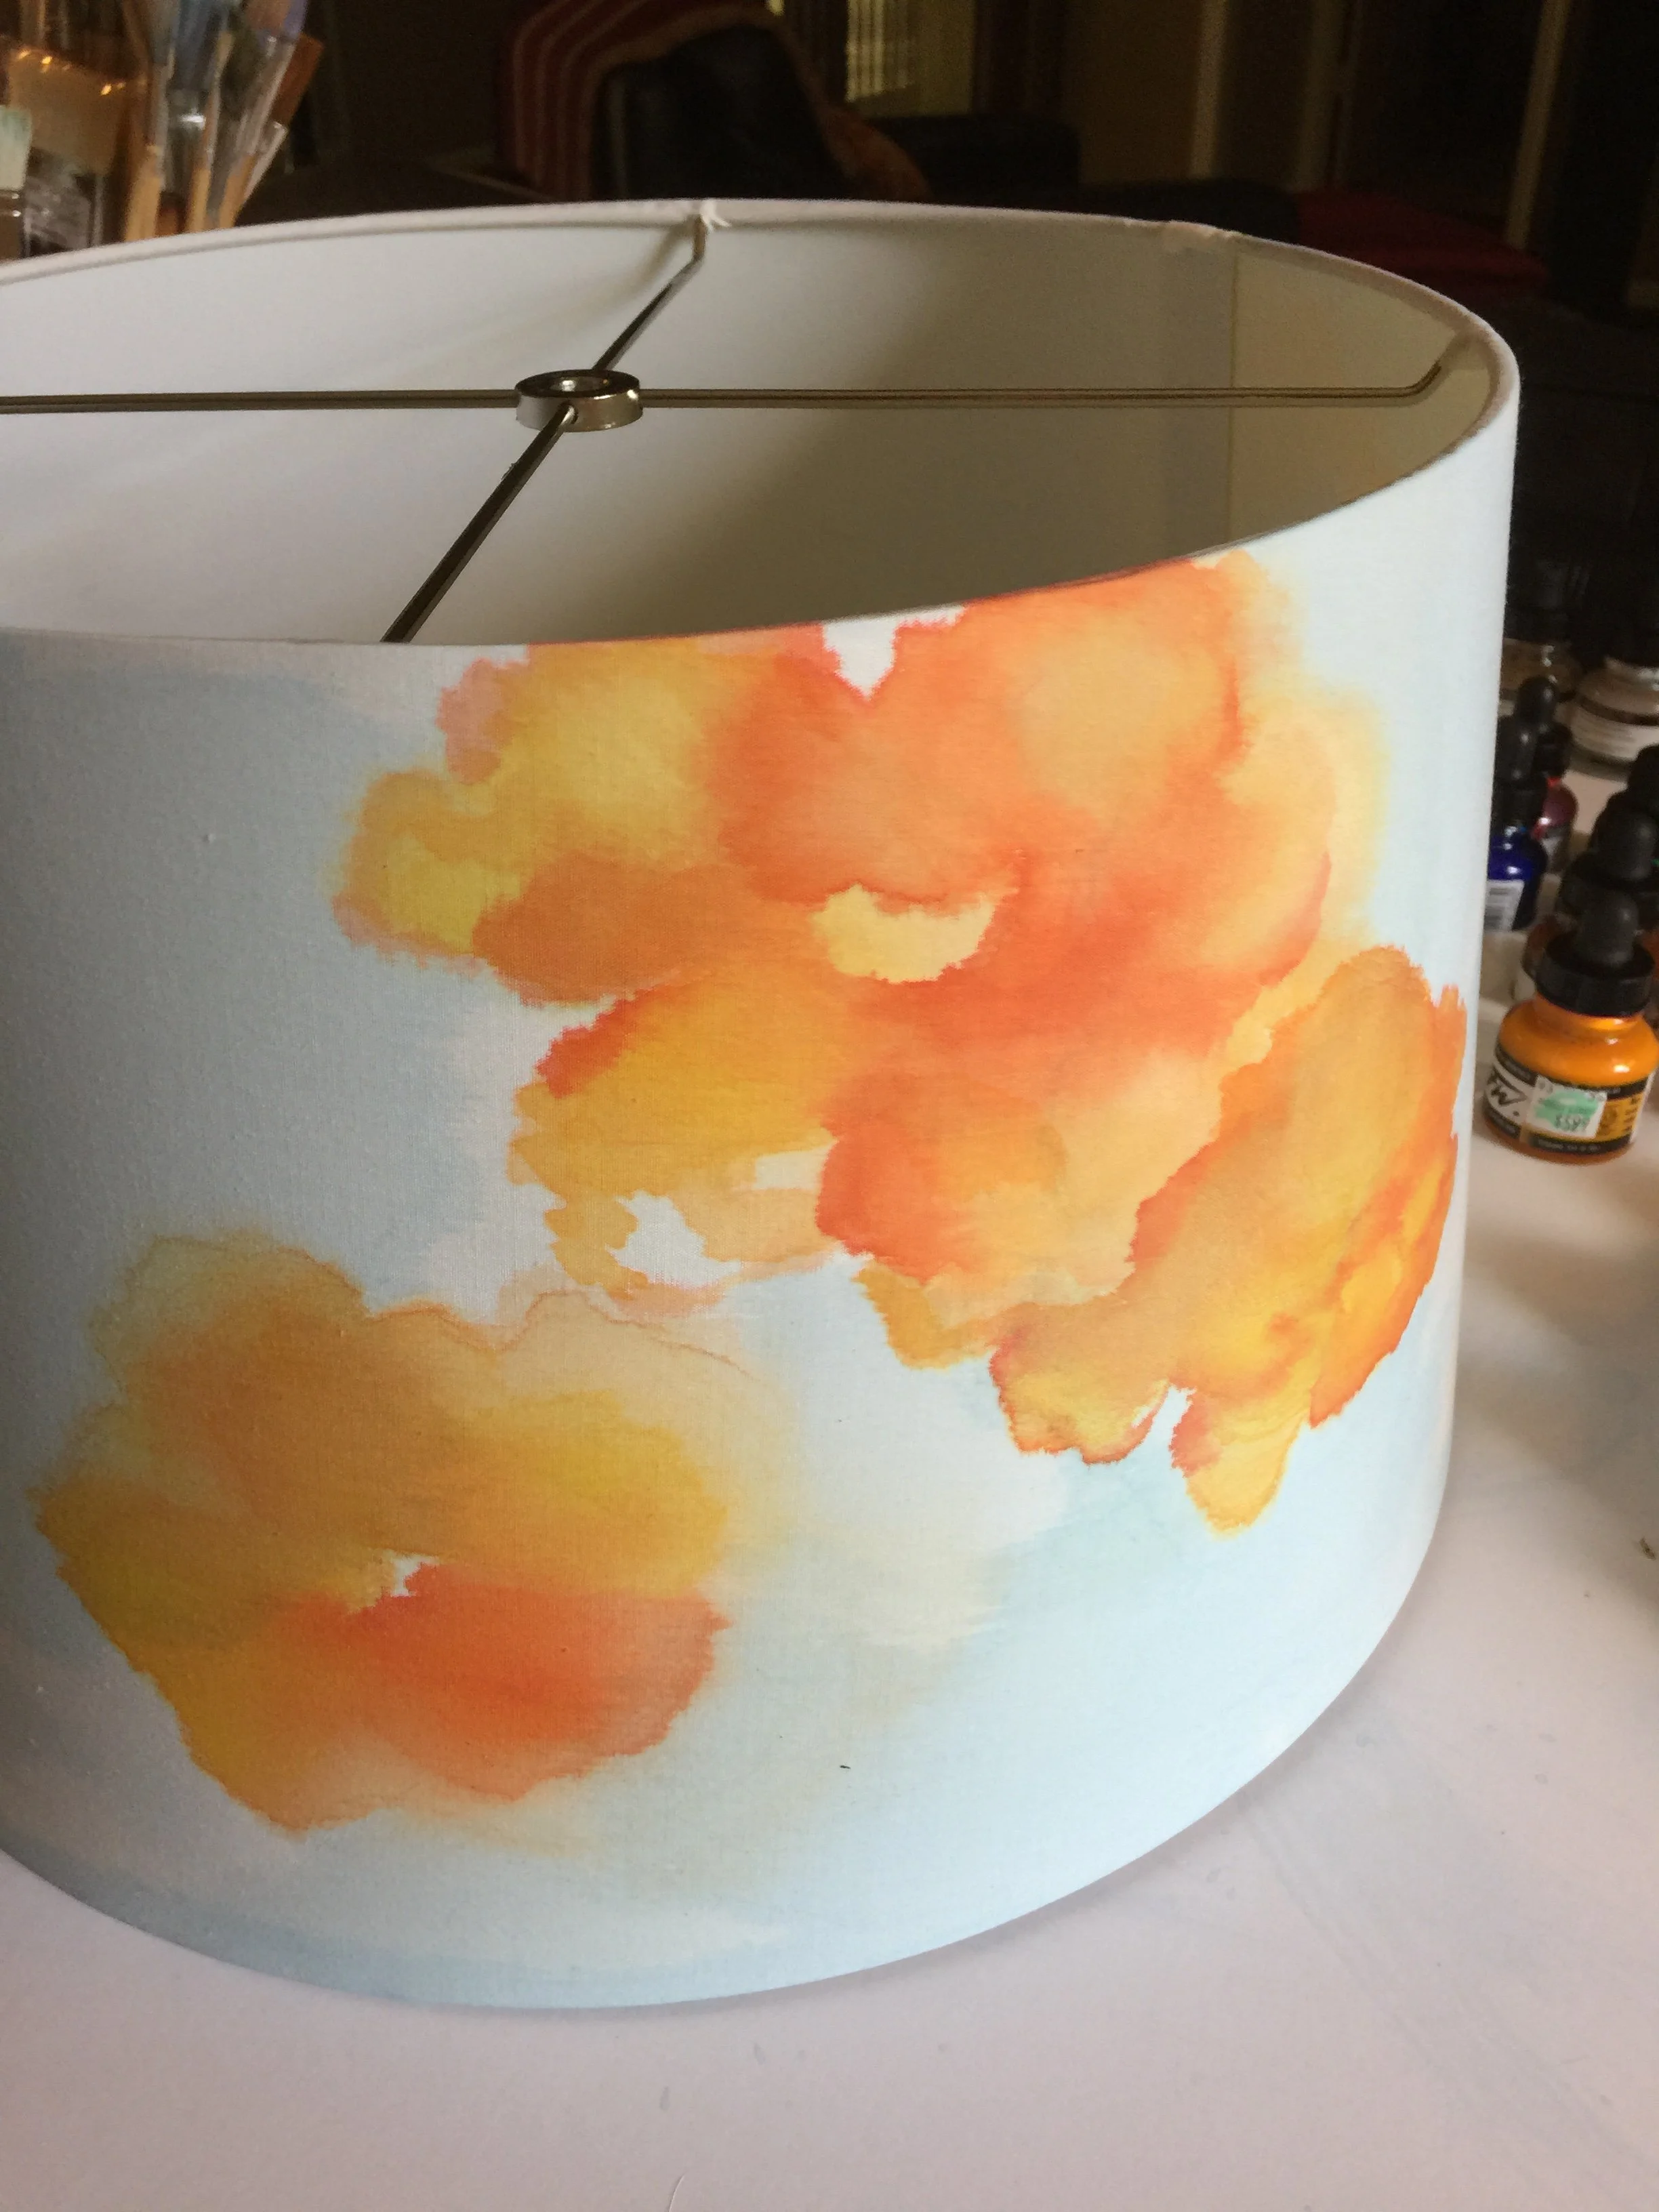
Frequently assess your painting as you mop in the colors to create an overlapping of petals, form a center in each cluster with leaves around them. Once again dry between layers. Repeat until you have achieved the depth and look you want. Wet your working area as you begin building your design. Remember, this is a very free form technique, you never know what design may emerge from the spreading of the pigment. If you see it forming a beautiful unexpected pattern, dry it and leave it...move on to another area of the shade. With your watercolor brush add indications of smaller petals, leaves, and flower centers.
This technique can also be used on other NON-WASHABLE fabric surfaces to create designs ie. scarf or decorative pillow case covers. A foam board is recommended behind your fabric to create a hard surface while applying ink.